DAISY Support
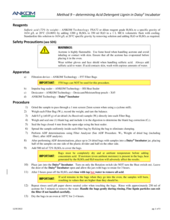
Manuals & Methods


Top Five FAQs
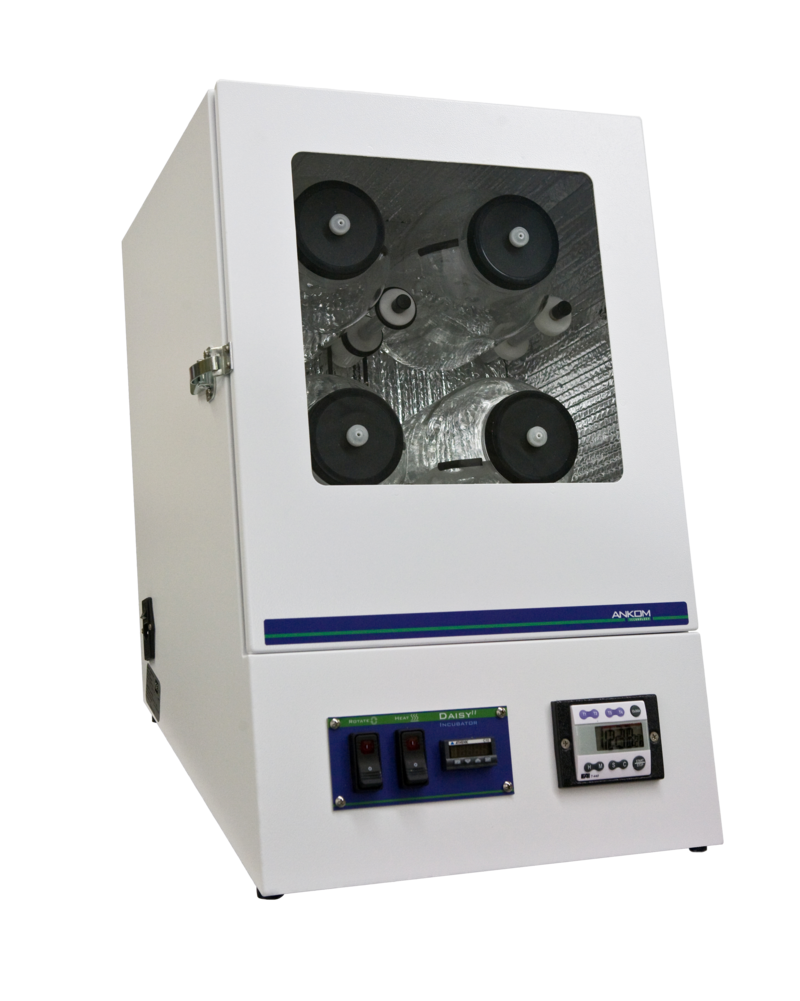
When the rotation switch is activated on the Daisy, the jars should continue to rotate until the switch is turned off.
Possible Causes:
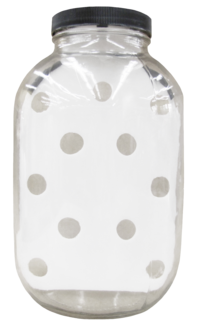
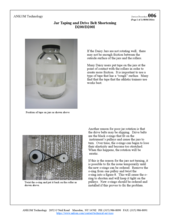
There is not enough friction between the outside surface of the jars and the rollers on the instrument. This is especially true if either the outside surface of the jars or the rollers are moist. Many Daisy users put tape on the jars at the point of contact with the rollers in order to create more friction. Of course, it is important to use a type of tape that has a "rough" surface. Many find the tape that athletic trainers use to tape athletes works best. See D200 Service Procedure 6.
The drive belts may be slipping. This may occur if the Daisy has a bit of age on it. The drive belts are the black o-rings that fit on the instrument's pulleys and cause the jars to turn. Overtime, the o-rings can begin to lose their elasticity and become too stretched. When this happens, the rotation will be erratic. If this is the reason for the jars not turning, it is possible to fix the issue temporarily until the new o-ring can be ordered. Remove the o-ring from one pulley and twist the o-ring into a figure 8. This will cause the o-ring to "shorten" and will keep it tight on the pulleys. New o-rings should be ordered and installed if this proves to fix the problem. See D200 Service Procedure 6.
The set screw on the drive pulley may be loose and is slipping on the motor shaft. Tightening the set screw with a 3/32 hex wrench to the drive shaft will fix this problem. Refer to D200 Service Procedure 1 and reference the steps related to reattaching the drive pulley.
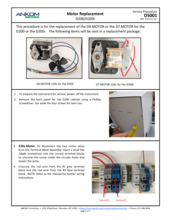
The motor may be going bad. This however is a bit unusual and each of the above possibilities should be investigated thoroughly before ordering a new motor. Contact ANKOM for information on how to test the motor. To replace motor see D200 Service Procedure 1.
Contact ANKOM Technology via e-mail at https://www.ankom.com/contact/technical-services or by calling 1-315-986-8090 for assistance in making this determination. Follow D200 Service Procedure 1 to replace the motor on the Daisy instrument.
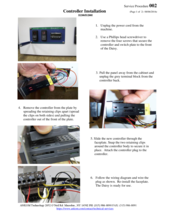
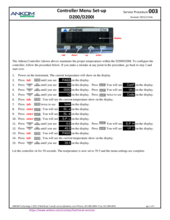
Possible cause: A power surge has occurred.
Solution: Reprogram your controller using the controller menu setup in your Operator's Manual
Possible Causes:
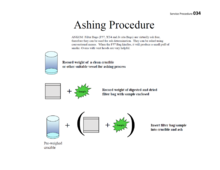
1) Sample size is too large.
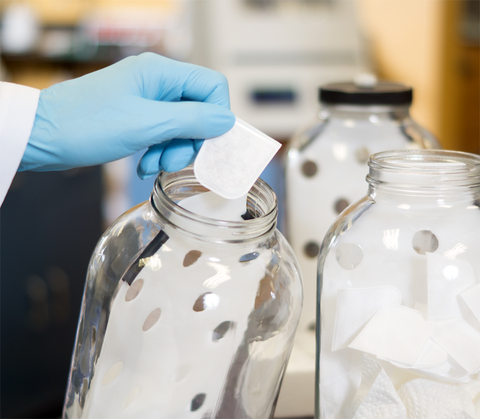
2) Bags were not acetone rinsed.
3) The rubber baffle spacers fell off.
Possible Solutions:
1) Ensure that the procedure is followed completely.
2) Reduce sample size to .025 per procedure.
3) Rinse bags with acetone and thoroughly dry prior to filling.
4) Check baffle spacers.
The F57 Filter Bags should not be oven-dried after the acetone treatment. Doing so can release the calendared set (heat and pressure used to flatten) we put on the filtration media from which the bags are made. Simply allow the acetone to completely evaporate from the bags before filling the bags with sample.
Troubleshooting? Let us help!
For the most efficient and quick way to determine what your instrument issue is, it is important to follow the button below to fill out the technical service form. Our team will review and get back to you with help!
Parts and Support Products
Browse the DAISY Product Catalog for associated parts and support items
Research Papers
Associated papers and studies utilizing the DAISY Incubator
Consumables
Filter Bag Technology for use in the DAISY Incubator
SDS Sheets
View available product documentation and safety information

Service Procedures

How can we help?
Don’t see what you need on this page?
Search for a specific topic to browse all resources.