Log in/Register
  • Create new account
  • Request new password
  • Home
  • News
  • About ANKOM
  • Contact Us
ANKOM Technology logo
  • Product Catalog

    Our Product Catalog

    • Vitamin, Cholesterol & Total Fat
    • Dietary Fiber
    • Crude/Detergent Fiber
      • DELTA
      • |
      • A2000
      • |
      • A200
    • Total/Crude Fat
      • XT15
      • |
      • XT10
      • |
      • HCI

    • Gas Fermentation Measurement
    • In Vitro Incubation
    • Filters, In Situ & Support Products
    • Chemicals And Enzymes
      • Chemicals
      • |
      • Enzymes
      • |
      • Certificates of Analysis

  • Technical Support

    Technical Support

    • FLEX Vitamin & Cholesterol
    • TDF Analyzer
    • Fiber Analyzers
      • DELTA
      • |
      • A2000
      • |
      • A200
    • Fat Extractors
      • XT15
      • |
      • XT10

    • Hydrolysis System and RD Dryer
    • RF Gas Production System
    • Daisy Incubator
  • Analytical Procedures & Support

    Analytical Methods & Support

    • FLEX Vitamin & Cholesterol
    • Dietary Fiber
    • Crude/Detergent Fiber
      • DELTA
      • |
      • A2000
      • |
      • A200

    • Total/Crude Fat
      • XT15
      • |
      • XT10
      • |
      • HCI
    • Gas Fermentation Measurement
    • In Vitro Incubation

  • Case Studies
    • Eurofins, Des Moines
    • Dupont Pioneer Livestock Nutrition Ctr
    • Hebron University
    • Dairy One Cooperative
    • EPL Bio Analytical Services
    • Kuwait Institute for Scientific Research
  • Global Distribution
0 items

Technical Support

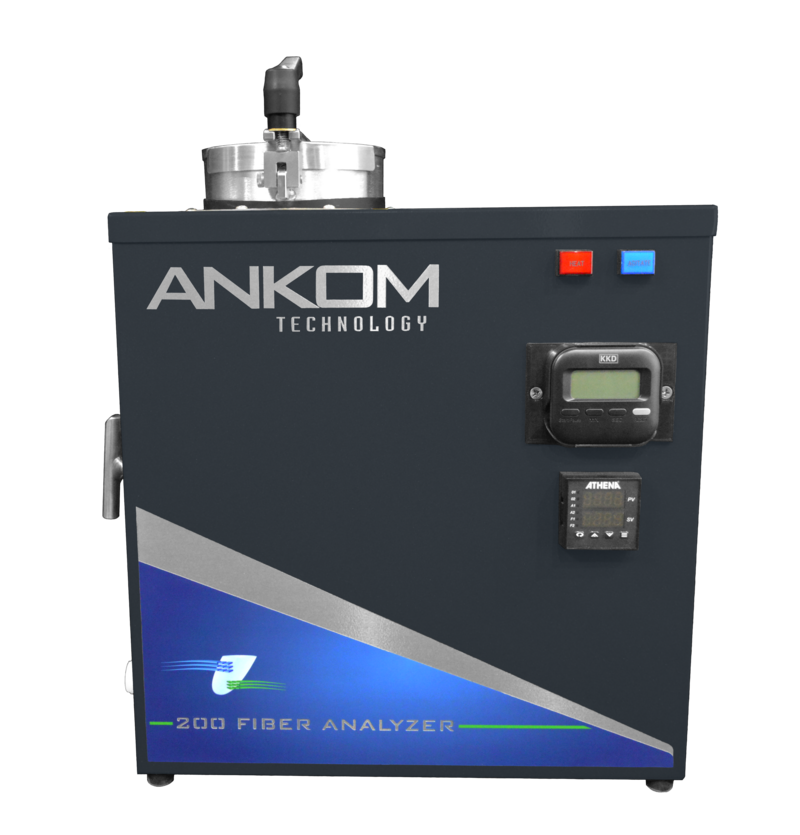
Fiber Analyzer A200

  • FLEX Vitamin & Cholesterol
  • TDF Analyzer
  • Fiber Analyzers
  • Fat Extractors
  • Hydrolysis System and RD Dryer
  • RF Gas Production System
  • Daisy Incubator
  • DELTA
  • A2000
  • A200
  • FAQs
  • Service Procedures
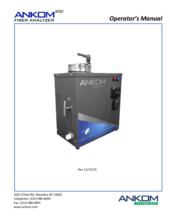
  • Operator's Manual
  • Video Library
  • Filters & Support
  • SDS Documents
  • Analytical Procedures

FAQ Category

  • Analytical/Results Troubleshooting (21) Apply Analytical/Results Troubleshooting filter
  • Instrument Troubleshooting (7) Apply Instrument Troubleshooting filter

FAQ Group

  • Assays and Methods (11) Apply Assays and Methods filter
  • Consumables (7) Apply Consumables filter
  • Controller Problems (3) Apply Controller Problems filter
  • Results (3) Apply Results filter
  • Check Packing (2) Apply Check Packing filter
  • Maintenance and Service (2) Apply Maintenance and Service filter

High or Low Assay Results

High or Low Assay Results

Check to ensure the procedures sent with your instrument were followed. Some possible variables that may affect your
results are:

General Problems:

  • ND chemicals can come out of solution- Heat and stir to bring back into solution.

  • Oven temperature too hot (102°C-105°C +/-2°C)

  • Modifying the settings on the Controller

  • Improper weighing technique-See weighing technique in the Appendix of the manual.

  • Improper or non-use of the desiccant pouch-A standard desiccator will introduce moisture in the samples as it is being opened and closed. This will cause poor precision.

Low Values:

  • Grind is too fine

  • Bag is not completely sealed

  • Broken seam in bag allowing sample to escape from bag

  • Digestion run too long (ADF & Crude Fiber)

High Values:

  • The movement of the bag suspender is less than 1/2" (1.2 cm) up and down. Refer to your A200 Operator's Manual section titled Initial/Periodic Maintenance.

  • Solution is not heated sufficiently-Perform ANKOM Boil Test (see A200 Service Procedure 6)

  • ND- Failure to use Alpha Amylase and/or Sodium Sulfite

  • AD/ND-Sample too high (>5%) in fat and not pre-treated with solvent

  • Crude Fiber-always pre-soak with acetone

  • Oven temp low, wet samples introduced next to dry samples-samples are not sufficiently dried.

  • Lack of or incorrect use of desiccant pouch-check for holes in pouch, packets not dried regularly-refresh desiccant

  • Rinse water not hot enough (70°C+ ND, AD) (50°C +CF) or not long enough (5 minutes)

  • Digestion not run long enough

  • Acetone re-used for removing water from bags post extraction

  • Improper calculation of blank bag correction or using the wrong values in the formula

  • Bag sealed too low

  • Too much sample in the bag

  • Sample not spread out in the bag

  • Vessel lid was not closed tightly enough (the tightness of the lid only applies to the A200, A200I, A220)

What size screen do we use to grind samples?

What size screen do we use to grind samples?

Our grinding recommendation for samples to be extracted in our Fiber Analyzer is:

1 mm with a Wiley Mill
2 mm with a Cyclone Mill (such as UDY or Retsch)

What is the porosity of the ANKOM F57 and F58 Filter Bags?

What is the porosity of the ANKOM F57 and F58 Filter Bags?

F57

The porosity of the ANKOM F57 Filter Bag is 25 microns. The design of the filter bag provides a three-dimensional filter matrix similar to the filtering effect of a glass crucible. The F57 Filter Bag provides equal filtration without the manual intervention required with a crucible method.

F58

The porosity of the ANKOM F58 Filter Bag is 6-9 microns. The design of the filter bag provides a three-dimensional filter matrix similar to the filtering effect of a glass crucible. The F58 Filter Bag provides equal filtration without the manual intervention required with a crucible method.

How do I prepare a Filter Bag for ADF, NDF, or Crude Fiber testing?

How do I prepare a Filter Bag for ADF, NDF, or Crude Fiber testing?

Depending on what you are testing, refer to section ADF Analysis, NDF Analysis, or Crude Fiber Analysis in the ANKOMDELTA Fiber Analyzer Operator's Manual. 

Why is my blank bag heavier after the run than before the run?

Why is my blank bag heavier after the run than before the run?

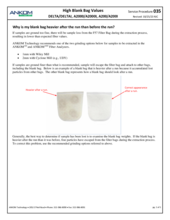
Refer to A200 Service Procedure 19.

Related Documents: 

High Blank Bag Values

AttachmentSize
PDF icon FS019_High_Blank_Bag_Values.pdf146.46 KB

How do I determine the Blank Bag Correction Factor?

How do I determine the Blank Bag Correction Factor?

The Blank Bag Correction allows for a weight adjustment based on actions that take place during solubilization. The resulting factor adjusts your sample bag weight in an up or downward direction. To determine the blank bag correction, include at least one empty, sealed and weighed filter bag (blank bag) with your run. After the samples and blank bag have been through the solubilization process and dried as required, divide the final weight of the blank bag by the initial weight. If the samples have been properly prepared, this will result in a factor usually in the 0.992-0.998 range with the F57 filter bag. If the blank bag value is greater than 1.0, refer to FAQ "Why is my blank bag heavier after the run than before the run?"

What is a MoistureStop Desiccant Pouch, how is it used, and why should I use it?

What is a MoistureStop Desiccant Pouch, how is it used, and why should I use it?

The MoistureStop Desiccant Pouch is a small, airtight zipper bag, utilized for desiccating all of the Filter Bags that are used with ANKOM instrumentation. A single pouch can hold a full run of F57, F58 or XT4 bags at one time.  When folded, 6 IDF or SDF bags can also be placed into a MoistureStop Desiccant Pouch. Each time a bag has been removed from the desiccant pouch, the air can and should be pushed out. The "zipper" does not have to be used with every bag removal but some action should be taken to keep the air from entering the pouch while the just removed Filter Bag is being weighed. For example, air can be pushed out of the bag by laying it on a firm surface while compressing or flattening the air out of the pouch with your hand.

Many instruments in the marketplace have the capacity to run 6 samples at a time.  After being dried, the beakers, flasks or crucibles are placed into a counter top or cabinet desiccator.  Once cooled, they are then removed one at a time and weighed. Each time the desiccator is opened to remove sample, moist ambient air is introduced inside the desiccator. However, because the lid or door of the desiccator is opened just 6 times, the samples that remain in the desiccator after each item is removed are affected very little by ambient moisture that may be introduced.

However, with Filter Bag Technology, generally larger numbers of Filter Bags are extracted at a time. As with the beakers, flasks and crucibles mentioned above, if the bags are placed in a desiccator after drying, each time the lid or door is opened to remove a bag, moist, ambient air is introduced. Because the desiccator is opened up to 24 times, the moisture can more readily affect the remaining bags. If a collapsible, ANKOM desiccant pouch is utilized, the air can be pushed out of the pouch each time a Filter Bag is removed. This will eliminate a build up of moisture on the remaining Filter Bags and allow for a more accurate and precise result. Every month it is possible to place the small desiccant packets into the oven at 100° - 105°C for a few hours to insure that the desiccant is renewed. In addition, to ensure the integrity of the zip lock bag, regular replacement should be considered.

What are the required temperatures for the hot water rinses?

What are the required temperatures for the hot water rinses?

It is important that the rinse water going into the instrument is at least 50°C for Crude Fiber and 70°C for detergent fibers. For safety purposes, most hot water heaters are set lower than 70°C. In addition, if there is a substantial distance between the instrument and the hot water heater, the rinse water will, at least initially, be cooler. For these reasons we suggest the purchase of a small hot water heater that can be placed next to the instrument. ANKOM Technology has a small (10 liter) water heater suitable for both the DELTA/DELTAI and the A200/A200I available for purchase (A02).

Should I use distilled water in my fiber rinses?

Should I use distilled water in my fiber rinses?

Rinse water can come directly from the tap. It does not have to be distilled.

Can I do sequential analysis using FBT?

Can I do sequential analysis using FBT?

It is possible to follow a NDF with an ADF run using the same sample and Filter Bag. The only drawback is that some samples will produce a lower than expected ADF value when a NDF is run first. This is because certain components like pectin, tannins, glucans and fructans are removed by NDF solution but not by ADF solution. Therefore, these components are not present in the sample when the ADF follows the NDF. When you test these types of samples, you will have artificially lower ADF values than you would if you had only run an ADF without the NDF. This issue has nothing to do with the Filter Bags. They will hold up to both assays with no problem. In fact, you can even follow the ADF with a lignin procedure using the same bags if you wish.

Caution when drying the bags: When running a Lignin procedure or a sequential NDF/ADF or NDF/ADF/Lignin with the F57 Filter Bag, it is important not to dry the bags overnight after the NDF or ADF procedure. A drying timeframe of 2-4 hours at 100° to 105°C is sufficient to thoroughly dry the bags after each procedure. Extended drying times or too high of a temperature can compromise the bag's filtration media.

Can the ANKOM Filter Bags be ashed? How do I prepare the F57 & F58 filter bags for ashing?

Can the ANKOM Filter Bags be ashed? How do I prepare the F57 & F58 filter bags for ashing?

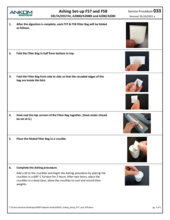
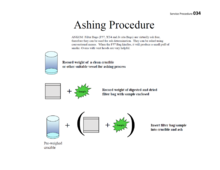
The F57 and F58 filter bags are ash free and therefore can be used for ash determination. See Service Procedure 033 for the Ashing Procedure.


Related Documents: 

Ashing Set-up F57 and F58

AttachmentSize
PDF icon AS033_Ashing_Setup_F57_and_F58.pdf167.27 KB

Ashing Procedure

AttachmentSize
PDF icon AS034_Ashing_Procedure.pdf369.99 KB

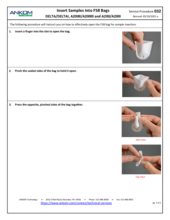
The F58 filter bag is less stiff than the F57. What is the most effective way to keep the F58 bag open in order to place sample within the bag?

The F58 filter bag is less stiff than the F57. What is the most effective way to keep the F58 bag open in order to place sample within the bag?

Refer to A200 Service Procedure 15.

Related Documents: 

F58 Bag Preparation for Sample Insertion

AttachmentSize
PDF icon FS015_F58_Bag_Preparation_for_Sample_Insertion.pdf223.19 KB

I have experienced a few F58 Filter Bags break open during an Acid Detergent Fiber (ADF) procedure. Why does this happen, and what can I do to minimize it?

I have experienced a few F58 Filter Bags break open during an Acid Detergent Fiber (ADF) procedure. Why does this happen, and what can I do to minimize it?

To enhance the solution flow through the filter, F58 Filter Bags are made from a hydrophilic material. When exposed to 1N sulfuric acid at high temperatures the material can break or crack at the seams/seal. Make sure each bag is sealed within 4mm of its open end. This section includes a narrow polypropylene strip that provides elasticity to the heat-sealed area of the bags to prevent cracking. In addition, with some older bag suspenders, the F58 bags are susceptible to abrasion.
-
To minimize breakage at F58 Filter Bag seams, you should use the new F58 bags (as of March 2015). The seams of the new bags are strengthened by the addition of point bonds next to the edge of the seal.
-
To minimize bag material abrasion, you should use the new bag suspender (as of March 2015 - part # F11). It has been redesigned to include rounded bottom points on each tray.

Our NDF Solution has turned a milky white color and has objects floating around in it. Has the solution gone bad? Is there anything we can do to get it back to its clear state?

Our NDF Solution has turned a milky white color and has objects floating around in it. Has the solution gone bad? Is there anything we can do to get it back to its clear state?

When neutral detergent solution gets cold, some of the components will begin to precipitate out of solution. As a result, the solution will turn milky white and particles will be floating in it. These particles can be brought back into solution and the solution cleared by heating it. If the container that holds the NDF solution can fit in a lab oven, it is possible to place the solution in the oven over night at 30°C. If this is not feasible or if you need the solution sooner, pour some of the solution into a beaker and heat the solution on a hot plate or in a microwave. When heated, pour the solution back into the main container to warm up the remaining solution. Repeat until all of the solution is clear with no precipitation.

Why is the filter bag not sealing?

Why is the filter bag not sealing?

Possible Causes:

The dial on the heat sealer is not be turned up high enough. In order to seal the F57 Filter Bag, the dial must be set at approximately "4." In order to seal the XT4 Filter Bag the dial must be set to approximately "6." Different lab conditions may effect the proper setting. Experiment with a bag to "dial in" the correct setting.

The heating element is broken. On the sides of the Teflon cover on the heater sealer are two shiny metal strips that keep the cover in place. Loosen the screws that keep the strips tight to the base of the heat sealer and remove the Teflon cover. Check to see if there is a break in the heating element. If there is, take the extra heating element that comes with the heat sealer and replace the defective element. Additional elements can be ordered from ANKOM Technology (SKU: 1917).

The Insulator is not properly installed. The insulator should be installed to ensure that the heating element does not touch any of the metal on the base of the heat sealer.

Why is the agitator not working?

Why is the agitator not working?

Possible Causes:

Motor wires are loose or disconnected. Unplug the instrument. Inspect the wiring to the motor. Contact ANKOM if a loose or disconnected wire is found.

If wires are intact run this test: Turn the instrument on and press the blue "Agitate" button. Check to see if the motor is turning. (The fan at the bottom of the motor will spin if the motor is turning.)

The Motor Set Screw(s) is too loose. If the motor is turning but the agitator is not, you will need to tighten the set screw(s) on the gray coupler with an Allen wrench. Note: Be sure to unplug the instrument before tightening the set screws.

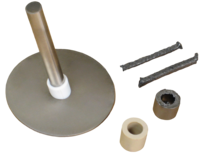
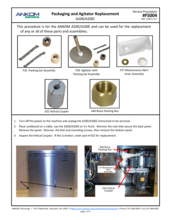
The Packing Nut is too tight. If the motor is not turning when the "Agitate" button if pressed, you may need to loosen the brass packing nut.

  1. Unplug the instrument.
  2. Loosen the brass packing nut so you can turn it easily with your fingers.
  3. Reach down into the vessel and twist the agitator disk back and forth a couple of times
  4. Plug the instrument back in.
  5. Turn the instrument on and press the blue "Agitate" button.
  6. If the agitation begins, tighten the brass packing nut until you hear the motor begin to labor (you will hear the tone of the motor change slightly). When the tone changes, loosen the brass packing nut 1/8 of a turn and the tone will change back. This is the appropriate tightness.

The agitator may have corrosive buildup. If periodic maintenance was ignored and acid solution was allowed to leak into the packing assembly, the shaft may become "frozen". Check for corrosive buildup. The packing set and agitator may need to be replaced.

The motor may have failed. This is a bit unusual and each of the above possibilities should be investigated thoroughly before ordering a motor. If all of the above steps have been reviewed and the agitator still does not turn, the motor will need to be replaced.

The controller shows incorrect temperature. What should I do?

The controller shows incorrect temperature. What should I do?

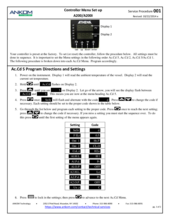
To ensure that the controller settings are correct: see A200 Service Procedure 2 (for instruments purchased pre 9/03) or see A200 Service Procedure 1 (for instruments purchased Post-09/03)

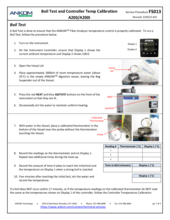
If settings are correct you will need to test the controller and calibrate it. To test the controller see A200 Service Procedure 6.

Related Documents: 

Controller Menu Set-up

AttachmentSize
PDF icon FS001_Controller_Menu_Setup.pdf164.85 KB

Controller Reset Procedure (pre 9-03)

AttachmentSize
PDF icon FS002_Controller_Reset_Procedure_pre_9_03.pdf109.4 KB

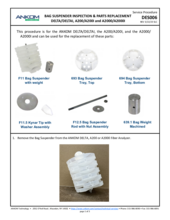
Why are my bag suspender trays melted?

Why are my bag suspender trays melted?

For illustrations of Melted Trays see A200 Service Procedure 16. Melting of bag suspender trays happen when there is not enough solution in the vessel to cover all of the trays while the instrument's heat is activated.

Possible Causes:

  • The person operating the instrument did not put enough solution into the vessel to cover all of the trays.

  • The exhaust valve is slightly open and some of the solution slowly drips out of the vessel during the extraction.

  • The red heat button is not turned off at the end of the extraction after the solution has been drained from the instrument and the trays are left in the instrument.

  • There is an adequate amount of solution and the heat is on but the agitation is not turned on.

If bag suspender trays are melted you should do the following:

1).  Replace melted trays see links below for:

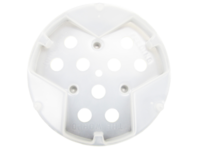
Bag Suspender w/ weight
Bag Suspender Tray (bottom)
Bag Suspender Tray (top)

2).  Inspect inside of vessel to determine if any plastic melted to the walls.  If so, fill vessel with water and turn on heat until the water boils. Turn off heat.  Carefully scrap the plastic from the walls and remove plastic pieces.  Drain water and wipe out any remaining plastic residue.

Related Links: 
Bag Suspender w/ weight
Bag Suspender Tray, bottom
Bag Suspender Tray, top

Why does the instrument stop heating?

Why does the instrument stop heating?

When the pressure in the vessel is too high, the pressure switch will turn off the heater.

Possible Causes:

There is too much solution in the vessel. Make sure 2 liters or less of solution is used in the vessel at a time.

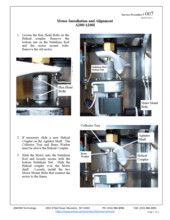
The motor is not turning or is stalling during a run which will cause a higher temperature in the vessel and thereby raising the pressure. Check to make sure the fan is on the motor. Replace the fan if needed. See A200 Service Procedure 7.

There is a corrosion problem. Inspect the agitator, the bag suspender weight, and the bag suspender rod to see if any corrosion is taking place.

The controller is not calibrated and heater higher than it should. See A200 Service Procedure 6.

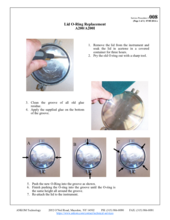
The bag suspender is sticking in vessel. See A200 Service Procedure 16.

All of the above cause a pressure failure. When this occurs, the heat lamp will go out and the temperature will drop until the pressure is lowered sufficiently (generally below 90oC) at which time the heat will come back on and will continue to cycle on and off.

When the temperature in the instrument becomes too high, the heat will shut down but the heat lamp will remain on. When the temperature drops sufficiently (generally below 90oC) the heat will come back on and will continue to cycle on and off.

Related Documents: 

Motor Installation and Alignment

AttachmentSize
PDF icon FS007_Motor_Installation_and_Alignment.pdf551.54 KB

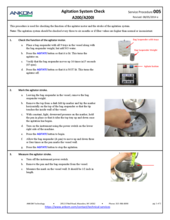
Is my agitation sufficient?

Is my agitation sufficient?

See A200 Service Procedure 5.

Related Documents: 

Agitation System Check

AttachmentSize
PDF icon FS005_Agitation_System_Check.pdf243.45 KB

During the run, the temperature on the A200 controller drops 10 degrees C or more and then recovers. The HEAT light remains ON when the temperature drops. Why does this happen?

During the run, the temperature on the A200 controller drops 10 degrees C or more and then recovers. The HEAT light remains ON when the temperature drops. Why does this happen?

The instrument is experiencing a high temperature fault.  If your controller is set for 100°C , there are two possible reasons for this fault.

  1.  The agitation is not working properly during an assay. 

To check the agitation during an assay, remove the back panel of the instrument and do the following:

  • Check that the motor fan is spinning (refer to A200 internal components).  If the motor is not spinning, turn off and unplug the instrument.  Then loosen the brass packing nut 1/2 turn and check the wiring connections to the motor.  Plug the instrument back in and press the Agitate button.  If the motor starts to turn, reset the packing nut (refer to A200 Service Procedure 4 for instructions).  if the motor does not turn after loosening the packing nut and the wiring connections are good, replace the motor (refer to A200 Service Procedure 7 for instructions).
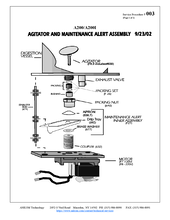
  • Check that the agitator shaft is spinning (refer to A200 internal components - look between the Maintenance Alert Collector and the Helical Coupler).  If the motor fan is spinning, but the agitator shaft is not spinning, then one or both of the set screws on the Helical Coupler need to be tightened.  Turn off and unplug the instrument before tightening the set screws.
  1. The actual temperature has exceeded the ETS capacity and must be replaced.

To replace the ETS, remove the back panel of the instrument and locate a black object bolted to the upper left side of the vessel (refer to A200 internal components).  NOTE: Attached to the bottom of the ETS is an orange wire and attached to the top is a cloth covered wire. Disconnect the existing ETS and install a new one in its place.

Related Documents: 

A200 Internal Components

AttachmentSize
PDF icon A200 Internal Components.pdf249.05 KB

Motor Installation and Alignment

AttachmentSize
PDF icon FS007_Motor_Installation_and_Alignment.pdf551.54 KB

During the run, the temperature on the A200 controller drops 10 degrees C or more and then recovers. The HEAT light remains OFF when the temperature drops. Why does this happen?

During the run, the temperature on the A200 controller drops 10 degrees C or more and then recovers. The HEAT light remains OFF when the temperature drops. Why does this happen?

The instrument is experiencing a pressure fault.  There are three possible reasons for this fault.

  1. More than 2 L of solution was in the vessel during the digestion process.

A pressure fault will most commonly occur if there is more than 2 L of solution in the vessel during the digestion process, leaving a small head space.  Never use more than 2 L of solution in the vessel during the digestion process.

  1. Metal parts within the vessel are experiencing corrosion.

If the solution level is below 2 L and the instrument is running acid detergent, it is possible that corrosion of metal inside the vessel is producing additional gas that increases the pressure inside the vessel. Check for corrosion in the following areas:

  • inside the wall of the vessel

  • agitator disk in the bottom of the vessel

  • metal parts of the bag suspender (including the weight)

Corroded parts must be replaced.

  1. The pressure switch has failed.

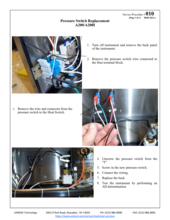
If you are not using more than 2 L of solution and the metal parts in your vessel are not corroded, replace the pressure switch (refer to A200 Service Procedure 10 for instructions).

Related Documents: 

Pressure Switch Replacement

AttachmentSize
PDF icon FS010_Pressure_Switch_Replacement.pdf322.39 KB

Why must the instrument be at Room Temperature (about 20°C) before performing a Crude Fiber or Acid Detergent Fiber procedure?

Why must the instrument be at Room Temperature (about 20°C) before performing a Crude Fiber or Acid Detergent Fiber procedure?

During a crude fiber or acid detergent procedure, the time frame during which samples are exposed to 100°C solution(s) is extremely important.  If the fiber analyzer begins a procedure at a temperature higher than 20°C, the instrument will heat the solution too quickly and the effective digestion time frame will be too long.  This will create lower than expected fiber values.  As a result, when performing back-to-back fiber runs with the second being a crude fiber or acid detergent procedure, we would suggest pouring cold water into the vessel prior to the second run in order to cool the instrument to room temperature.

How can I be sure that all the acid has been rinsed from the Filter Bags at the end of an ADF digestion?

How can I be sure that all the acid has been rinsed from the Filter Bags at the end of an ADF digestion?

Test the rinse water with litmus paper during the last minute of the fourth hot water rinse. If the test indicates the presence of acid, repeat with fresh, hot water until neutral pH is achieved.

Can I remove only a portion of the dry chemicals from FND20C to make less than 20L of solution?

Can I remove only a portion of the dry chemicals from FND20C to make less than 20L of solution?

Neutral detergent consists of varying amounts of 4 dry chemicals and triethylene glycol.
If you remove only a portion of the dry chemicals to make less than 20L of solution, it is impossible to know if the solution has the correct ratio of chemicals.
The only way to ensure that the chemical solution consists of the correct ratio of chemicals is to make all 20L at one time.

If I used expired Alpha Amylase for a NDF assay, can I re-run the bags or do I have to start over?

If I used expired Alpha Amylase for a NDF assay, can I re-run the bags or do I have to start over?

Amylase is utilized to help digest the starch in the sample. Even using expired Alpha Amylase, it is highly likely the non-starch components, as well as, most of the starch are gone. 

Put the filter bags in a 1L beaker with 80o C water and 8 ml of fresh Alpha Amylase and allow the bags to soak for 20-30 minutes. This should remove any residual starch.  If you have an Fiber Analyzer, you could put the bags in the bag suspender, place them in the instrument with the heat off (you don’t want boiling water) and turn on the agitation. After 20-30 minutes rinse the bags once for 5 minutes, dry and weigh.

Why are my lignin results higher than expected?

Why are my lignin results higher than expected?

With the lignin procedure, there are two common errors that will create false high values.

The first error is placing the F57 Filter Bags into the 72% sulfuric acid when there is moisture in the bags and samples. To avoid this situation, after the ADF procedure is complete and the Filter Bags have been dried and weighed, place the Filter Bags back into the oven at 100o to 105° C for 30 to 60 minutes. When the bags have been dried, place them into a desiccant pouch and allow them to cool to room temperature. Once they have been cooled, immediately place them into the 72% sulfuric acid and begin the procedure.

The second error occurs in the rinsing of the bags after the three-hour soaking in 72% sulfuric acid. It is vital that all of the acid is rinsed out of the bags before the F57’s are placed into the oven for drying. The rinsing process uses copious amounts of fresh water. After several minutes of rinsing, touch several bags with litmus paper. If the litmus paper shows the presence of acid in any of the bags, continue the rinsing for several more minutes and test again. Continue to test the bags with litmus paper until no bags show the presence of acid. Place the bags into a beaker, pour enough acetone to cover the bags and soak for 3 to 5 minutes. When the soaking is complete, pour off the acetone, lay them on a clean surface, and allow the acetone to evaporate from the bags. Place the filter bags into the oven at 100° to 105° C for at least two hours. When the bags have been dried, place them into a desiccant pouch and allow them to cool to room temperature. Once they have been cooled, weigh the bags one final time.
 

How do I determine cellulose, hemicellulose, and lignin content with the ANKOM fiber instruments?

How do I determine cellulose, hemicellulose, and lignin content with the ANKOM fiber instruments?

The ANKOM fiber instruments can analyze for either Acid Detergent Fiber (ADF), Neutral Detergent Fiber (NDF), or Crude fiber. NDF consists of Hemicellulose, Cellulose, & Lignin. ADF consists of Cellulose and Lignin. Acid Detergent Lignin (ADL) consists of lignin only. ADL analysis can be done after ADF analysis, in beakers or in the ANKOM Daisy instrument. Therefore, Hemicellulose content can be determined by subtracting ADF from NDF. Cellulose content can be determined by subtracting ADL from ADF.
 

Parts & Ancillary Products

Product Catalog
Link here to access a full list of parts and ancillary products for the A200 Fiber Analyzer.
Parts List

Related Links

Contact Us
Global Distribution
Warranty Information

Videos

ANKOM 200 Automated Fiber Analyzer

ANKOM 200 Automated Fiber Analyzer

ANKOM 200 Fiber Analyzer Analytical Principle

ANKOM 200 Fiber Analyzer Analytical Principle

arrow-white-footer.pngHave Questions or Feedback?
Connect
Follow us on TwitterFind us on FacebookConnect with us on LinkedIN

Menu

  • Product Catalog
  • Technical Support
  • Analytical Methods & Support
  • Case Studies
  • Global Distribution
  • Privacy Policy
  • Refund Policy

ANKOM Technology

©2023 ANKOM Technology All Rights Reserved
ANKOM Technology 2052 O'Neil Road, Macedon NY 14502
Tel: 315.986.8090 | Fax: 315.986.8091
x

We use cookies on this site to enhance your user experience. By clicking any link on this page you are giving your consent for us to set cookies. Read our Privacy Policy.