Log in/Register
  • Create new account
  • Request new password
  • Home
  • News
  • About ANKOM
  • Contact Us
ANKOM Technology logo
  • Product Catalog

    Our Product Catalog

    • Vitamin, Cholesterol & Total Fat
    • Dietary Fiber
    • Crude/Detergent Fiber
      • DELTA
      • |
      • A2000
      • |
      • A200
    • Total/Crude Fat
      • XT15
      • |
      • XT10
      • |
      • HCI

    • Gas Fermentation Measurement
    • In Vitro Incubation
    • Filters, In Situ & Support Products
    • Chemicals And Enzymes
      • Chemicals
      • |
      • Enzymes
      • |
      • Certificates of Analysis

  • Technical Support

    Technical Support

    • FLEX Vitamin & Cholesterol
    • TDF Analyzer
    • Fiber Analyzers
      • DELTA
      • |
      • A2000
      • |
      • A200
    • Fat Extractors
      • XT15
      • |
      • XT10

    • Hydrolysis System and RD Dryer
    • RF Gas Production System
    • Daisy Incubator
  • Analytical Procedures & Support

    Analytical Methods & Support

    • FLEX Vitamin & Cholesterol
    • Dietary Fiber
    • Crude/Detergent Fiber
      • DELTA
      • |
      • A2000
      • |
      • A200

    • Total/Crude Fat
      • XT15
      • |
      • XT10
      • |
      • HCI
    • Gas Fermentation Measurement
    • In Vitro Incubation

  • Case Studies
    • Eurofins, Des Moines
    • Dupont Pioneer Livestock Nutrition Ctr
    • Hebron University
    • Dairy One Cooperative
    • EPL Bio Analytical Services
    • Kuwait Institute for Scientific Research
  • Global Distribution
0 items

Technical Support

Fat Extractor XT10

  • FLEX Vitamin & Cholesterol
  • TDF Analyzer
  • Fiber Analyzers
  • Fat Extractors
  • Hydrolysis System and RD Dryer
  • RF Gas Production System
  • Daisy Incubator
  • XT15
  • XT10
  • FAQs
  • Service Procedures
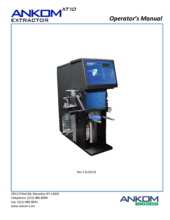
  • Operator's Manual
  • Video Library
  • Filters & Support
  • SDS Documents
  • Analytical Procedures

FAQ Category

  • Analytical/Results Troubleshooting (14) Apply Analytical/Results Troubleshooting filter
  • Instrument Troubleshooting (6) Apply Instrument Troubleshooting filter

FAQ Group

  • Assays and Methods (8) Apply Assays and Methods filter
  • Results (4) Apply Results filter
  • Faults (3) Apply Faults filter
  • Maintenance and Service (3) Apply Maintenance and Service filter
  • Consumables (2) Apply Consumables filter

How do I prepare a Filter Bag for Crude (free) Fat testing?

How do I prepare a Filter Bag for Crude (free) Fat testing?

Refer to the Fat Extraction Process section of the ANKOM XT10 Extractor Operator's Manual.  See subsection, Sample Preparation Procedure for Crude Fat.

Why are my Crude Fat Results High?

Why are my Crude Fat Results High?

There are three primary reasons for HIGH Crude Fat Results.

  1. The bag is not completely sealed such that sample gets lost during extraction.
  2. A bag picks up surface fat from another sample.
  3. Incomplete drying in the pre-extraction phase. This is the biggest contributor to high crude fat results. It is vital that all the moisture in the sample is removed before the extraction because the ANKOM technique uses the indirect method of determining fat (weighing what is left over after the fat has been extracted),  It is a good idea to regularly check your moisture (dry matter) values when performing fat extraction using ANKOM instrumentation. This can be done by simply weighing and recording the weight of the Filter Bag prior to filling it with sample. After the 3 hour drying step, when you re-weigh the bags plus sample, the following formula will give you the moisture value:

100 x ((Filter Bag Weight + Sample Weight) - Weight After Drying) / Sample Weight

We would suggest each lab regularly test this analysis by utilizing a check sample or lab standard.

Low moisture values tend to be due to:

  • Not using or incorrectly using desiccant pouches
  • Incorrect oven temperature settings (100 - 105°C)
  • Hot or cold spots in the oven
  • The oven is being over loaded with other samples or glassware

Why are my Crude Fat Results Low?

Why are my Crude Fat Results Low?

Crude Fat results could be low for any of the following reasons:
 
  1. The extraction was not run for a long enough period of time.
  2. The sample was not post-extraction dried enough.
  3. Fat migrated from a bag during the pre-dry step.
  4. Desiccant was either not used or incorrectly used during the post-dry phase.
  5. The water was not turned on or the flow meter was turned down.
  6. There was too much sample in the bags or too many bags in the instrument.

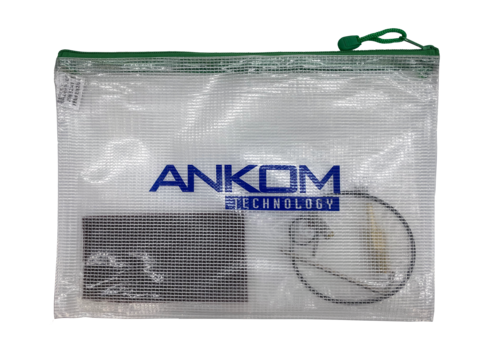
What is a MoistureStop Desiccant Pouch, how is it used, and why should I use it?

What is a MoistureStop Desiccant Pouch, how is it used, and why should I use it?

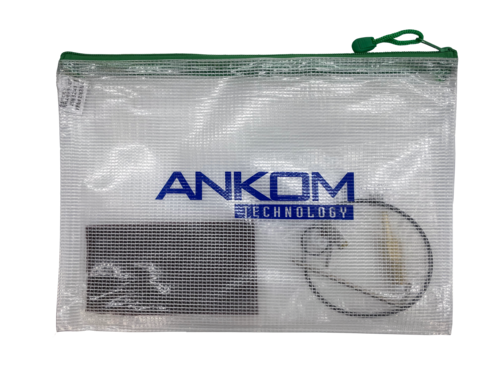
The MoistureStop Desiccant Pouch is a small, airtight zipper bag, utilized for desiccating all of the Filter Bags that are used with ANKOM instrumentation. A single pouch can hold a full run of F57, F58 or XT4 bags at one time.  When folded, 6 IDF or SDF bags can also be placed into a MoistureStop Desiccant Pouch. Each time a bag has been removed from the desiccant pouch, the air can and should be pushed out. The "zipper" does not have to be used with every bag removal but some action should be taken to keep the air from entering the pouch while the just removed Filter Bag is being weighed. For example, air can be pushed out of the bag by laying it on a firm surface while compressing or flattening the air out of the pouch with your hand.

Many instruments in the marketplace have the capacity to run 6 samples at a time.  After being dried, the beakers, flasks or crucibles are placed into a counter top or cabinet desiccator.  Once cooled, they are then removed one at a time and weighed. Each time the desiccator is opened to remove sample, moist ambient air is introduced inside the desiccator. However, because the lid or door of the desiccator is opened just 6 times, the samples that remain in the desiccator after each item is removed are affected very little by ambient moisture that may be introduced.

However, with Filter Bag Technology, generally larger numbers of Filter Bags are extracted at a time. As with the beakers, flasks and crucibles mentioned above, if the bags are placed in a desiccator after drying, each time the lid or door is opened to remove a bag, moist, ambient air is introduced. Because the desiccator is opened up to 24 times, the moisture can more readily affect the remaining bags. If a collapsible, ANKOM desiccant pouch is utilized, the air can be pushed out of the pouch each time a Filter Bag is removed. This will eliminate a build up of moisture on the remaining Filter Bags and allow for a more accurate and precise result. Every month it is possible to place the small desiccant packets into the oven at 100° - 105 ° C for a few hours to insure that the desiccant is renewed. In addition, to ensure the integrity of the zip lock bag, regular replacement should be considered.

Can other solvents besides Petroleum Ether be used in the XT10/XT10I?

Can other solvents besides Petroleum Ether be used in the XT10/XT10I?

Petroleum ether is the most common solvent recommended for use in the XT Extractors.  Many other solvents will work depending on your individual objectives, but may require upgrades to the method or instrument in order for them to run effectively.  Hexane, for example, will run but occasionally will create an instrument fault on the first run of the day in cooler laboratories.  Simply restarting the instrument will solve this issue.  Some "higher penetrating" solvents (di-ethyl ether, ethyl ether, etc.) require a seal upgrade before the instrument will work properly.  Chlorinated solvents (chloroform and methylene chloride) can be utilized in the instruments but these solvents tend to damage the XT4 Filter Bags so we don't recommend their usage.

Please contact ANKOM (https://www.ankom.com/contact/technical-services) for part upgrade information or if you have a question about what solvent you plan to use.

Why is the pre-extraction drying phase so important? Should all samples be treated the same during the drying process?

Why is the pre-extraction drying phase so important? Should all samples be treated the same during the drying process?

a. The biggest and most common cause of artificially high crude fat results is an incomplete drying in the pre-extraction phase. Because our technique uses the indirect method of determining fat (weighing what is left over after the fat has been extracted), it is vital that all the moisture in the sample is removed before the extraction.

You should regularly check your moisture (dry matter) values when performing fat extraction using ANKOM instrumentation. This can be done by simply weighing and recording the weight of the Filter Bag prior to filling it with sample.  After the three hour drying step with the oven set at 100° - 105 ° C, place the bags in a desiccant pouch, allow to cool, and re-weigh the bags plus sample and use the following formula to calculate the moisture value:

100 x ((Filter Bag Weight + Sample Weight) - Weight After Drying) / Sample Weight)

Low moisture values tend to be due to:

  • Not using or incorrectly using a desiccant pouch
  • Incorrect oven temperature settings
  • Hot or cold spots in the oven
  • The oven is being over loaded with other samples or glassware 

We would suggest each lab regularly test this analysis by utilizing a check sample or lab standard.

As indicated above, all samples should be dried at 100 ° - 105 ° C for three hours. Most samples can be placed directly into the oven on a tray, in an ANKOM Multi-bag holder (part #H37), or any other device that will keep the bags in place during the drying process. However, the pre-extraction drying of high fat samples (meat > 20%, plants > 40%) requires the use of weigh tins. These sample types tend to have oil that begins to liquefy during the drying process. This oil can seep to the outside surface of the bag and/or drip from the bag. By placing each high fat sample in a pre-weighed weigh tin, the samples can be isolated from touching other bags and transferring oil.  In addition, any oil that drips from the bag will be captured by the weigh tin.

At the end of the drying process, the weigh tins are placed in a Weigh Tin Desiccator (part # X49), allowed to cool, and weighed back with the XT4 Filter Bags still in the weigh tins. The tins are then discarded and the samples are extracted in the XT Extractor.

b. Yes, all samples should be treated the same during the drying process.

Is there a special way to handle High Fat Samples?

Is there a special way to handle High Fat Samples?

High Fat Samples are defined as any meat sample with a fat content >20% and any plant sample with a fat content >40%. See XT Service Procedure #14.

Related Documents: 

High Fat Sample Handling

AttachmentSize
PDF icon XTS014_High_Fat_Sample_Handling.pdf591.93 KB

Can I extract liquid samples from an XT Extractor?

Can I extract liquid samples from an XT Extractor?

Yes, it is possible to extract liquid samples in an XT Extractor.

To understand how to extract liquid samples, view ANKOM XT10 & XT15 Crude (Free) Fat Extraction of Liquid Samples.

Why do I get negative crude fat values?

Why do I get negative crude fat values?

This can occur with samples that are very low in fat. Moisture left in low fat samples after the extraction is the issue. As AOCS Procedure AM 5-04 indicates, when the Filter Bags are removed from the Analyzer, they should be placed in an oven at 100 to 105°C for 15-30 minutes. The bags are then placed in a desiccant pouch an allowed to cool to room temperature (10 to 15 minutes) and reweighed.

It is possible that the extraction time was not long enough to gain a complete fat extraction from the low fat sample. In the vast majority of samples, a 60 minute extraction is sufficient. However, a longer extraction period may be necessary if the results show minus values.

Negative values may also occur is the sample is holding onto the solvent in spite of the post extraction drying step. You can determine if this is the case by drying the samples either for an additional 3 hours at 100°C or for an hour at 110 - 120°C. Both of these scenarios help to release solvent binding. It should be noted that with the higher temperature drying, there is a concern that more than just the solvent can be blown off so the lower temperature drying may be preferable.

It is important to make certain that the small desiccant packets should be blue. If the contents are any other color, the desiccant is no longer absorbing moisture. Remove the packets from the zip lock bag and place them in an oven at 100 to 105°C for at least an hour and they will be renewed (blue color will return.) At ANKOM, we perform this renewal process at least once a month. In addition, to insure the integrity of the zip lock bag, regular replacement should be considered.

Do some samples require a longer post-extraction drying time than 30 minutes?

Do some samples require a longer post-extraction drying time than 30 minutes?

Some samples with large amounts of carbohydrates (starches and cellulose) may bind small quantities of solvent and require additional post drying. To remove bound solvent, dry at 100 ° - 105 ° C for 1 - 3 hours.

How do I perform an extraction of oilseeds using an ANKOM XT instrument (FOSFA Equivalent)?

How do I perform an extraction of oilseeds using an ANKOM XT instrument (FOSFA Equivalent)?

To perform an extraction of oilseeds, refer to XT Service Procedure #12 Oilseed Extractions (FOSFA Equivalent).

Why do I get Low Values when I hydrolize my high fat samples?

Why do I get Low Values when I hydrolize my high fat samples?

Research with high fat samples has given us the following understandings:

Some samples with fats that have low melting point triacylglycerides or emulsifiers may encounter fat migration during hydrolysis.

To improve fat retention, increase the level of diatomaceous earth (DE) to sample ratio. A ratio of up to 7:1 can be used by reducing the amount of sample and increasing the amount of DE. No more than 1.5g of DE and sample should be placed in each bag.

The increased volume of DE inside the bags will limit the number of samples processed in the Hydrolysis chamber to ten.

Reducing the hydrolysis temperature and time may also improve fat retention.

If, after increasing the DE-to-sample ratio, fat continues to migrate from the bag then a crude fat extraction prior to the hydrolysis may be necessary. By running a crude fat extraction first, the readily available fats are removed before the hydrolysis, but are accounted for. The challenge with this technique is the additional time the process takes.

Fat migration can be detected by placing a blank bag next to suspect samples. Place blank bags next to high fat samples in the holder, and perform the hydrolysis. If a blank bag looses more than 0.0025g of weight during the extraction, this is an indication of fat loss from the neighboring high fat sample during the hydrolysis. Blank bags should always contain at least 0.5g of DE.

Excess pressure in vessel after extraction is complete

Excess pressure in vessel after extraction is complete

Possible Causes:

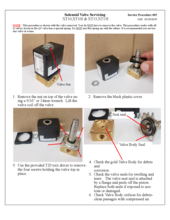
A valve may be "stuck" closed. If the instrument hasn't been used in awhile, it is possible that the solution is simply to clean the valves and clean any debris or buildup that may have settled on the valve piston.

To test:
Turn the instrument on and press <STOP> to initiate a drain cycle. If the pressure does not drop to zero in 3 minutes, you will need to clean Valves Q5 and Q6. See XT Service Procedure #5.

To clean Valves Q5 and Q6:
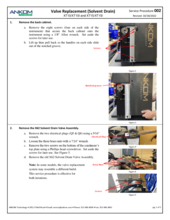
Remove the back of the machine and clean Valve Q5 and Q6 located on top of the condenser. It might be a good idea to clean one valve at a time, so that the solenoid coils do not get reversed.

After the valves are cleaned and put back together, run a 10 minute extraction to see if this solved the problem. When the 10 minute extraction ends, the screen will say "Draining". Contact ANKOM if the pressure does not drop to zero over the next 3-5 minutes.

Fault Screen: "ETS Heater" "OverHeat" [ENTER] Refer to the following:

Fault Screen: "ETS Heater" "OverHeat" [ENTER] Refer to the following:

See XT10 Service Procedure #2.

Related Documents: 

Fault - ETS

AttachmentSize
PDF icon X0S002_Fault_ETS.pdf306.01 KB

Fault Screen: "Operating Temp" "Fault"

Fault Screen: "Operating Temp" "Fault"

This fault indicates that the Instrument did not reach operational temperature (90°C) in 8 minutes.

Possible Causes:

A valve is leaking- The most common cause is a leaky Q1 Valve, which would cause cooling water to flow into the vessel during the heating stage.

To Test:

  1. Turn the instrument completely off but keep the water supply on. Check to see if water is running out of the drain line. Water should not running out of the drain line if the instrument is off. If it is, then you need to inspect and clean valves Q1, Q2, And Q3. (Q1 is the most important). To inspect the valves, turn off the water supply and See XT Service Procedure #5.
  2. After inspecting the valves, turn your water supply back on and verify that no water is running through the drain line while the instrument is off. Run an extraction. If the vessel is not heating, contact ANKOM Technology.

The Filter Bag is not sealing.

The Filter Bag is not sealing.

Possible Causes:

The dial on the heat sealer may not be turned up high enough. The XT4 Filter Bag is sealed at a setting of "6." Different lab conditions may effect the proper setting. Experiment with a bag to "dial in" the correct setting.

The heating element is broken. On the sides of the Teflon cover are two shiny metal strips that keep the cover in place. Loosen the screws that keep the strips tight to the base of the heat sealer and remove the Teflon cover. Check to see if there is a break in the heating element. If there is, take the extra heating element from the box that the heat sealer came in and replace the defective element. Additional elements can be ordered from ANKOM Technology.

The Insulator is not properly installed. The insulator should be installed to ensure that the heating element does not touch any of the metal on the base of the heat sealer.

How much water should be flowing through the instrument during a run? (A chiller is not used for the water supply.)

How much water should be flowing through the instrument during a run? (A chiller is not used for the water supply.)

The instrument uses 15 to 20 gallons of water during a 60 minute extraction. When the instrument is not operating, no water should be flowing. If there is any water going out the drain, water valves, Q1, Q2, or Q3 need to be serviced. During the run, water will flow at different rates. During filling, there should be a steady stream of water flowing out the drain, but no water flowing through the flowmeter in front. Once the instrument reaches 90oC, the reflux water valve (Q2), will turn on and off every minute or 2 throughout the extraction. When it turns on, the flowmeter should indicate at least 2-3 GPH (gallons/hour.) If your supply water is cold, a flow of 2-3 will work fine. A flow of 4-6 GPH would be ideal but it depends on the incoming water supply pressure. If there is good pressure but more flow is not achieved by adjusting the flowmeter, there may be a restriction in the water line or the flowmeter may need to be replaced.


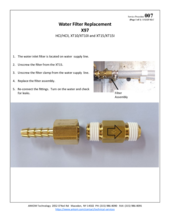
At the end of a run, during the heater cooling cycle, there will be a noticeably higher water flow through the instrument. The water exiting the drain tube should be cool. If the water flow is a trickle throughout the run, the water filter (X97) may be clogged. The filter is the fitting that connects the water supply to the instrument. The filter may be removed to try to blow it out. If this doesn't work, a replacement filter (X97) may be ordered.

How can the XT instrument be checked to verify it is operating correctly?

How can the XT instrument be checked to verify it is operating correctly?

Here is short list of steps to verify that the XT instrument is operating correctly. Always refer to your manual for complete, detailed information.

Refer to the XT15 Service Procedure #6 for a four page diagram that may help explain the operation.

1. Before starting, verify water pressure is ON and there is not water flowing through the drain line.

2. Add solvent to the XT15 fill cup until the solvent level reaches or exceeds the fill line in the site glass. (If XT10, add 350ml to vessel.)

3. Close the vessel, vessel should be held securely closed.

4. Select operating parameters and press START.

5. The XT10 will start heating immediately.

6. The XT15 will begin a FILL cycle. The Fill Valve (Q4) and Vent Valve (Q7) will open. After 60-90 seconds, solvent should fill the vessel and cover the glass level sensor in the XT15 vessel. The fill cycle will stop and the XT15 will start to heat.

7. During heating, observe the drain tube. There should be no water exiting the XT10 or XT15 during heating.

8. At minutes 2:00 and 4:00, the Q5 Valve will open briefly to exhaust any trapped air. The temperature on the LCD should rise rapidly. When it reaches 90oC, the reflux cycle begins. Do not open the vessel. Pressure should be approximately 20-50 psi, depending on the solvent.

9. At 5-8 minutes, the heat will reach 90oC and the reflux cycle begins. The reflux cycle turns the reflux water on for 60 seconds and off for 30 seconds throughout the duration of the run. You can observe the water flow rate by viewing the flow meter to the left of the vessel.

10. After the extraction has been completed, the condenser water valve will open and cool the condenser. The Q6 drain valve opens and the hot solvent will be pushed out of the vessel and into the condenser. On the XT10, the solvent will condense and fill the vent bottle. On the XT15, the solvent will fill the reservoir and site tube.

11. After draining, the vessel base will be cooled with water. The vessel walls will remain warm.

Related Documents: 

Solvent, Vent and Water Diagram

AttachmentSize
PDF icon X5S006_Solvent_Vent_and_Water_Diagram.pdf63.11 KB

How can black residue be cleaned off the bottom of the vessel?

How can black residue be cleaned off the bottom of the vessel?

When using the Mojonnier mixture of solvents, a black residue may build up on the bottom of the vessel. If this coating becomes too thick, an "Overtemp Fault" "<Enter>" may occur. The black residue can be cleaned using a drill with a long shafted stiff wire brush. This type of brush (Power Brush) can be purchased from ANKOM Technology: part number X107.

It may be helpful to pour a little of the solvent into the vessel when using the brush. Scotch-Brite Pads may also be used but require more frequent cleaning. Once the bottom of the vessel has been cleaned, put some solvent on a cloth or paper towel and wipe down the inside of the vessel in an effort to remove any oil residue and particles that have been loosened from the vessel bottom.

IMPORTANT: DO NOT USE SOAP IN THE VESSEL

What are the differences between the XT10 and XT15 instruments?

What are the differences between the XT10 and XT15 instruments?

The XT10 and XT15 look very similar and have much in common.  For example, both perform high temperature, high pressure soxhlet-like extractions on up to 15 samples at a time.  The kinetics of the extraction provide an extraction time of no more than an hour with the vast majority of samples.  They both have the same foot print and both recycle the solvent.  Finally, they both require a fresh water source, a drain and, of course, an electrical supply.
 
The area in which they are different is in the solvent insertion.  With the XT15, the technician adds up to 500 ml of solvent to a port on the left side of the instrument prior to using the extractor.  The solvent goes into a fresh solvent holding tank.  He/she then places up to 15 samples into the extraction vessel and locks the vessel closed.  Utilizing the instrument’s computer, he/she then sets the extraction solvent, extraction time and temperature and starts the process.  When the extraction is started, the solvent automatically is inserted into the closed vessel of the instrument and the extraction begins.  When the extraction is completed, about 97% of the solvent is recycled back into the holding tank, ready for the next extraction.  The samples are then removed, dried and weighed.
 
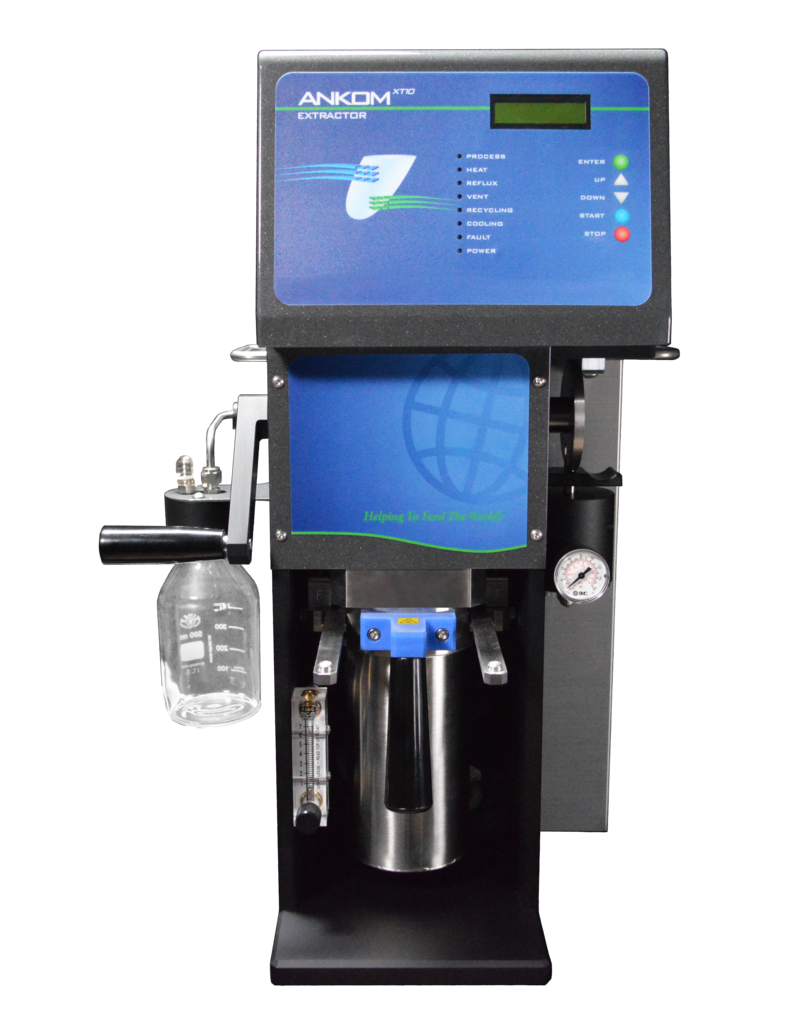
The XT10 does not have a holding tank.  When beginning an extraction, the technician pours the solvent into the vessel of the instrument, closes the vessel and begins the run.   At the end of the extraction, the solvent is recycled to a container on the left side of the instrument, ready to use again. 
 
Because the XT10 does involve some solvent exposure to the environment, most labs put this instrument in a hood while many XT15 users do not because the instrument is completely closed when the solvent is present.  The XT15 allows quicker turnaround from run to run because the technician doesn’t have to wait for the vessel to cool before adding solvent, contrary to XT10.  In addition, the exposure of the solvent with the XT10 means that the instrument tends to recycle a bit less of the solvent than does the XT15 – about 90%.

Parts & Ancillary Products

Product Catalog
Link here to access a full list of parts and ancillary products for the XT10 Fat Extractor.
Parts List

Related Links

Contact Us
Global Distribution
Warranty Information

Videos

ANKOM XT10 Extractor

ANKOM XT10 Extractor

arrow-white-footer.pngHave Questions or Feedback?
Connect
Follow us on TwitterFind us on FacebookConnect with us on LinkedIN

Menu

  • Product Catalog
  • Technical Support
  • Analytical Methods & Support
  • Case Studies
  • Global Distribution
  • Privacy Policy
  • Refund Policy

ANKOM Technology

©2023 ANKOM Technology All Rights Reserved
ANKOM Technology 2052 O'Neil Road, Macedon NY 14502
Tel: 315.986.8090 | Fax: 315.986.8091
x

We use cookies on this site to enhance your user experience. By clicking any link on this page you are giving your consent for us to set cookies. Read our Privacy Policy.